
Google Docs like other document processing tools out there allows users to perform various editing tasks on their documents including editing, formatting, printing, and more for free.
One of the many editing features on Google Docs is the ability to underline text or headings anywhere on your document. Underlining serves as a powerful tool to emphasize text and draw attention to key information in your document.
For many, they don’t just want to underline but instead, double underline on Google Docs but unfortunately, double underlining is currently not built into the platform.
That said, like many other problems you might encounter on Google Docs, there is a workaround to type a double underline on Google Docs.
If you’re looking to achieve this eye-catching effect on your document, you’re on the right page. In this article, you will learn how to double-underline text on any document on Google Docs in a few easy steps.
Quick Answer:
To double underline a text on Google Docs, follow these steps.
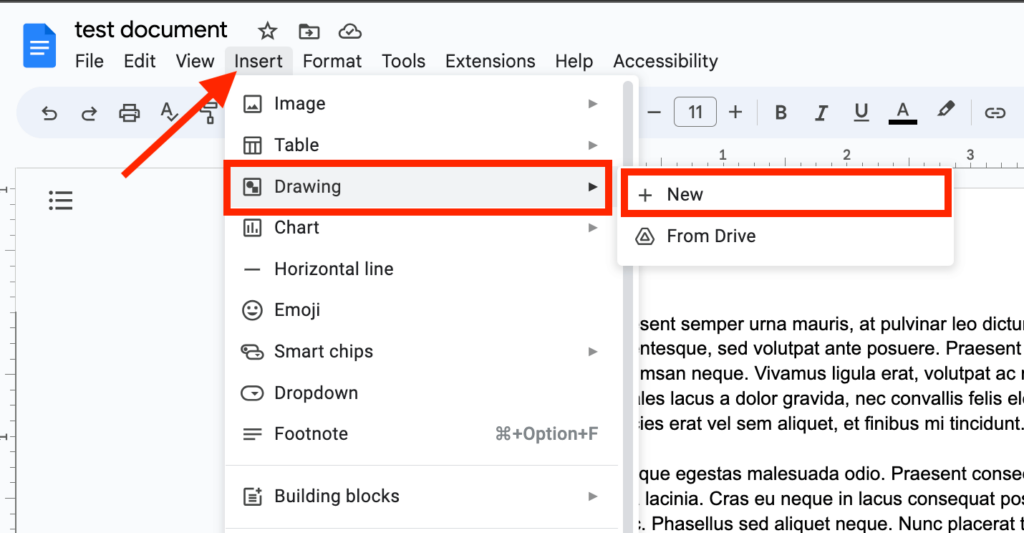
- Select Insert > Drawing > New on the Docs menu bar.
- Select the Line shape and draw a line on the canvas.
- Adjust the Line weight to your desired thickness.
- Duplicate the line and put it under the first.
- Click “Save and Close”.
- Set the text wrapping of the shape to “In front of text”.
- Adjust the Size and rotation.
- Move the lines to your desired location.
How To Double Underline On Google Docs (Step By Step Guide)
To double underline on Google Docs, you would first have to navigate to the Drawing tool on the platform using the menu bar.
On the Docs drawing tool, first draw a line then adjust the line weight to your desired weight/thickness. After that, simply duplicate the line and move the duplicate line to just under the original line you drew on the canvas to form a double underline.
When that’s done, save the shape (i.e. the double underline) and close the drawing tool dialog by clicking “Save and Close”. Now the double underline should be inserted into your document, adjust the text wrapping, and size (and position) then move the shape to just under the text you want to double underline.
Below is a step-by-step guide (with screenshots) showing how you can easily double underline a text on Google Docs.
Since we’ll be creating a custom shape to workaround the limitation of double underlining on Google Docs, you have to first navigate to the Docs drawing tool.
To do this, go to the Menu bar then click Insert > Drawing > New.
Step 2: Select the Line shape and draw a line on the canvas.
Next, click on the Line shape on the Drawing tool dialog and draw a straight line on the given canvas
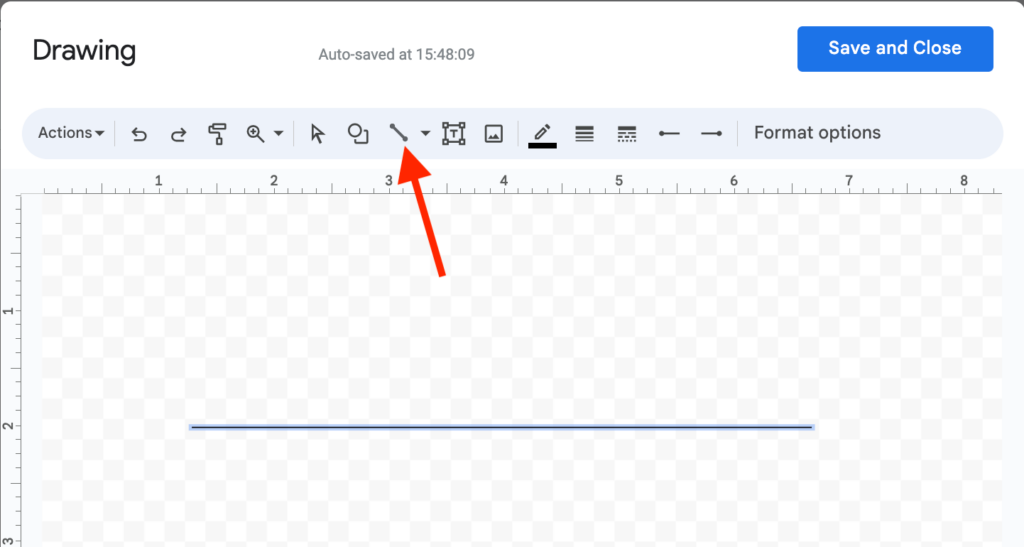
You can use the ruler feature on the left side of the canvas as a guide to ensure your line is as straight as possible.
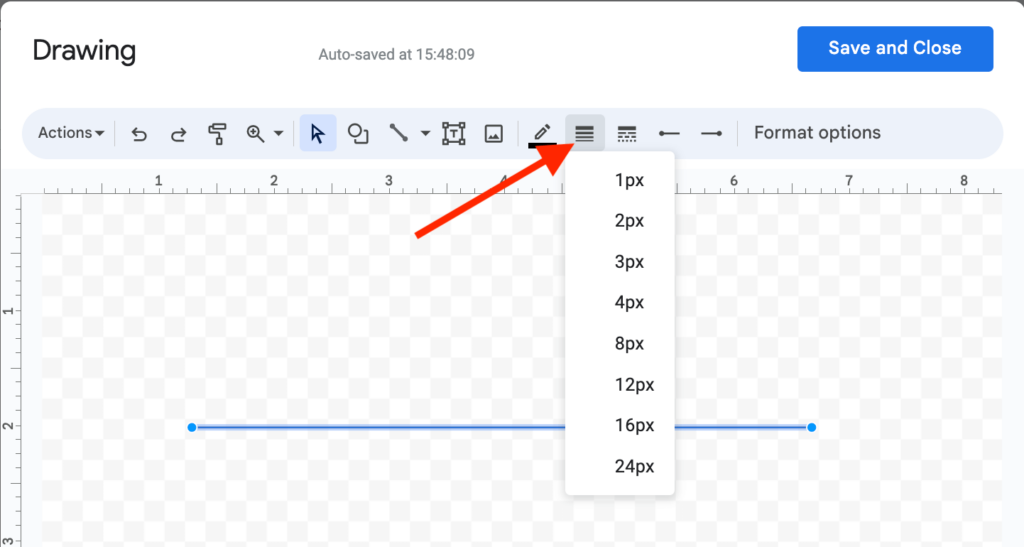
Step 3: Adjust the line weight to your desired thickness.
After drawing the line, you can adjust the line weight to your desired thickness.
If you want to put the double underline under a text in a paragraph on your document, you will have to reduce the thickness/weight of the line to the smallest possible number. Also if you want to use the double underline on a heading or bigger texts in general, then you will have to slightly increase the line weight.
To increase the weight of the line, click on the line Weight icon and select your desired weight from the drop-down menu.
Step 4: Duplicate the line and place the duplicate under the first line.
Next, you will need to duplicate the line to make it a double line (underline).
To do this, simply select the existing line you have drawn on the canvas then hit Ctrl + C (or command + C) on your keyboard to copy. After that press Ctrl + V (or command + V) to paste the line.
When you’re done duplicating the line, select the line you pasted and move the duplicate to just beneath the first line to form a double line as shown in the screenshot below.
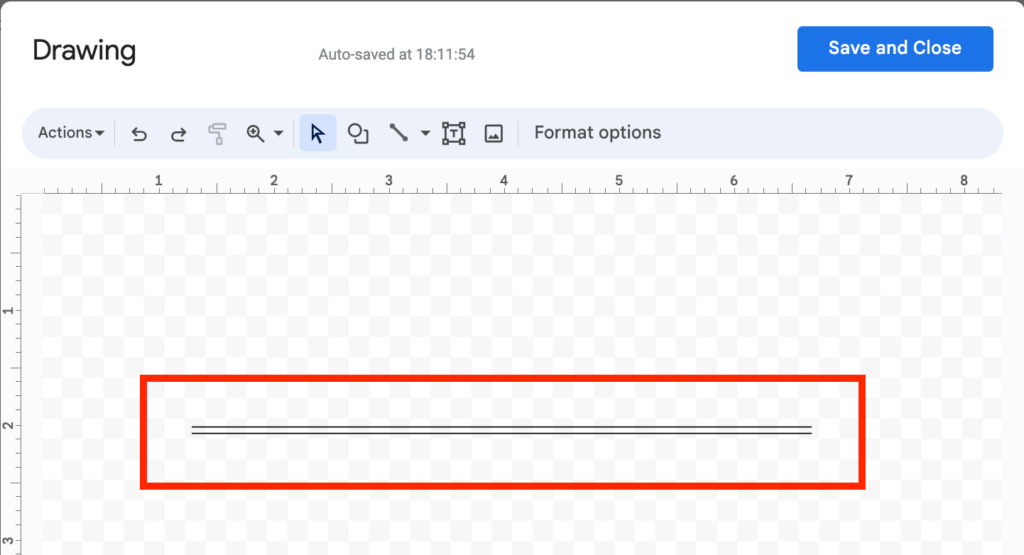
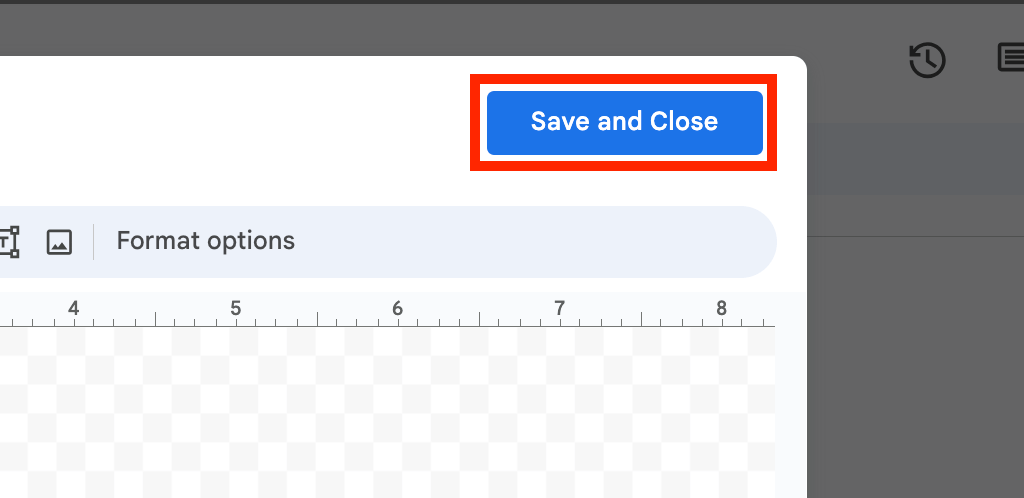
Step 5: Click “Save and Close”.
Now, hit the “Save and Close” button on the top right corner to save the shape you created, close the Docs drawing tool, and insert the shape into your document.
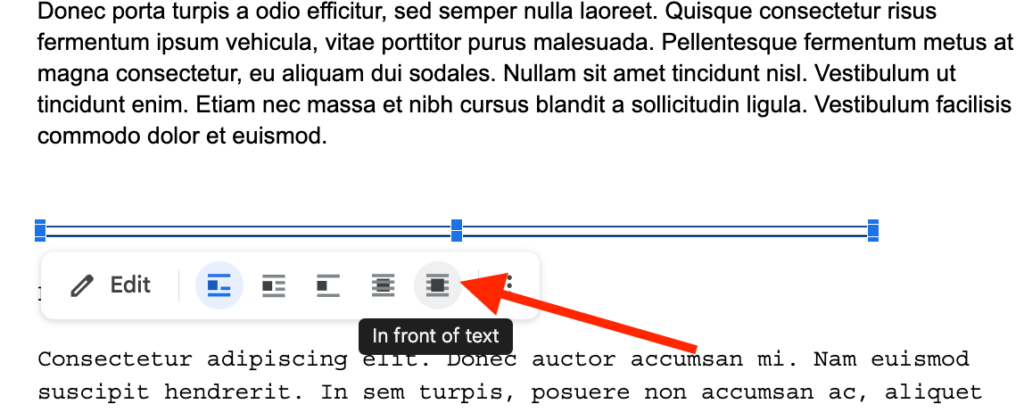
Step 6: Set the text wrapping of the shape to “In front of text”.
Next, you will have to change the text wrapping setting of the lines for it to fit within the paragraphs on your document.
Changing the text wrapping setting is quite easy. All you have to do is select the shape where it was inserted in your document then click on the “In front of text” icon to make the shape appear in front of your texts.
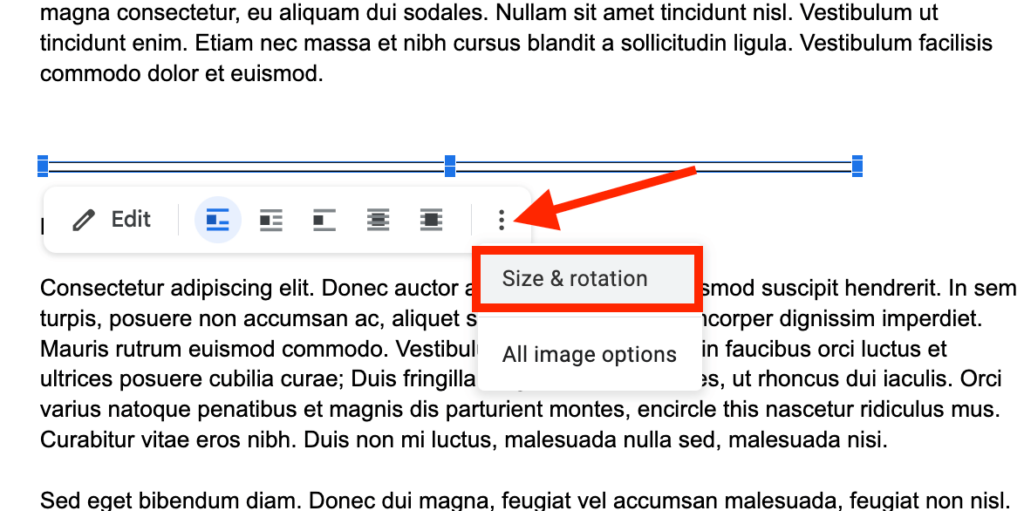
Step 7: Adjust the size and rotation of the shape.
After changing the text wrapping setting, you would have to play around with the size and rotation of the lines until you get the desired size of lines you want to do a double underline on your document in Google Docs.
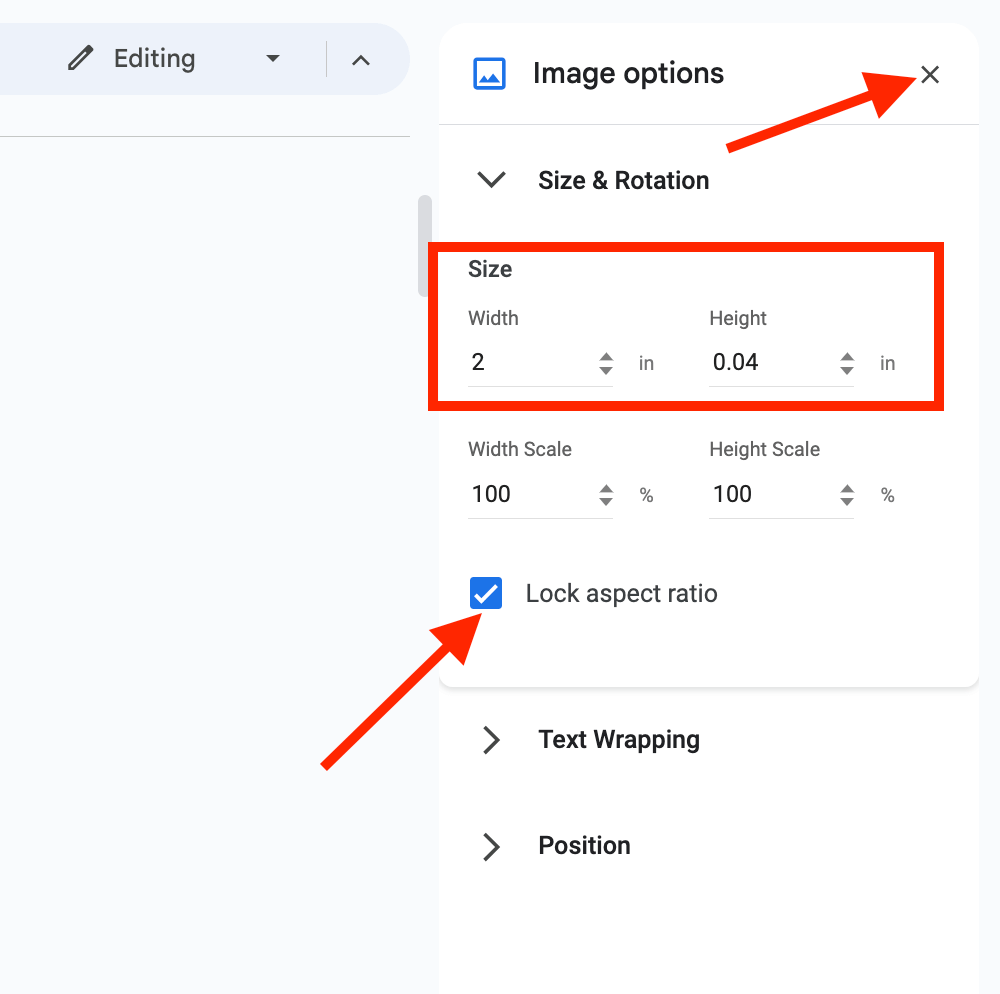
To access the size and rotation setting, select the shape click on the 3-dot (Image options) icon then choose “Size & rotation”.
Now you should see the Image options side panel on the right-hand side of your screen in the Google Docs window.
Go to the “Height” section and set the height of the underline depending on the type of text you intend to double underline.
For this article, we intend to double underline a text in a paragraph on our document so we’re going to be reducing the height to .04 to ensure the underline fits under texts in a paragraph.
You can also adjust the Width depending on what you want to underline. After setting your desired height and width, tick “Lock aspect ratio” and hit the “X” button to close the Image options side panel.
Step 8: Move the shape to just under the text you want to double-underline.
Now that you’re done editing the shape, simply select it and move to your desired location anywhere in your document – under the text you want to double underline like what we have in the screenshot below.
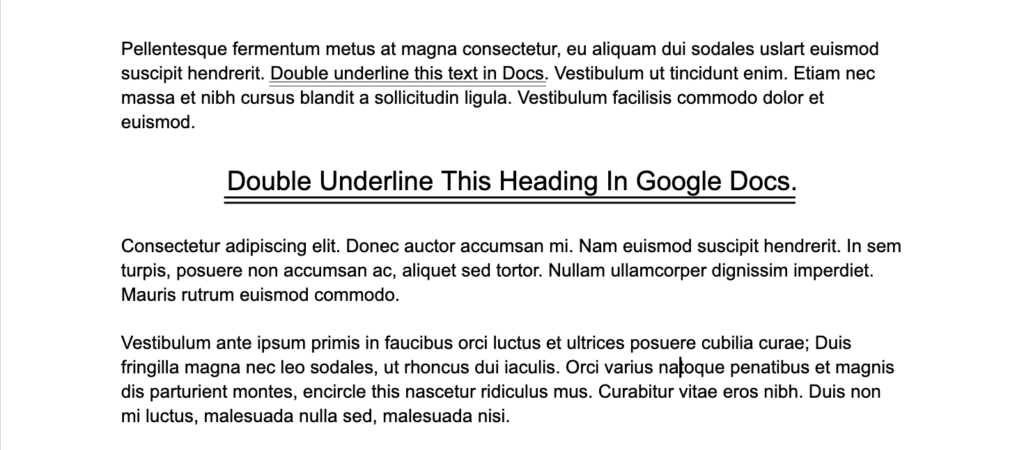
And that’s how you can double underline a text or heading on your document in Google Docs.
Wrapping Up
Like other word processing platforms, Google Docs offers users the ability to underline text and perform other basic editing functions. Sadly, if you want to double-underline something on Google Docs, you will have to use a few workarounds since there is no built-in feature for double-underlining on the platform.
To double-underline something on your document in Google Docs, you would need to use the drawing tool which can be accessed from the menu bar.
On the drawing tool, you would have to draw double lines and insert them as a shape into your document. After inserting, set the text wrapping to “In front of text” and adjust the size and position of the shape to your desired sizes.
Finally, move the shape to your desired location beneath the text or headings you want to double-underline.
And that will be it for this guide. If you were actively searching for an easy way to double underline on Google Docs, we hope you found this article helpful.
