

Google Docs remains one of the best (and free) platforms for creating and editing/customizing documents on the go.
While editing a document on Google Docs, you may want to add the current date or any date at all to a specific section(s) on the document If you’re new to the platform, it may be challenging to insert a simple date into your document in Google Docs but it doesn’t have to be that way.
Adding a date to Google Docs is quite easy and you can insert the current (today’s) date, yesterday’s date, tomorrow’s date, and just about any date to your document easily on Google Docs in a few easy steps.
If you landed on this page because you’re looking to insert dates into your documents in Google Docs, then you’re on the right page.
In this article, you will learn how to easily insert dates in your documents on Google Docs using several methods. We will also be providing some tips on when to use each method which will be discussed in the article.
How To Insert Dates In Google Docs (2 Methods)
On Google Docs, there are 2 methods you can use to insert dates into your documents on the platform.
The first method is by typing the “@” symbol followed by the day you want to insert its date. Available date options using this method include the current date, tomorrow’s date, yesterday’s date, and any other custom date of your choice if you use the “date” option.
The second method is by using the date picker feature which is available under “Smart chips” in the Google Docs Insert menu.
Below we discuss both methods that you can use to insert dates into your documents in detail.
Method 1: Using the “@” symbol to insert a date.
On Google Docs, you can use the “@” symbol to tag users, embed files, insert building blocks and various smart chips including dates.
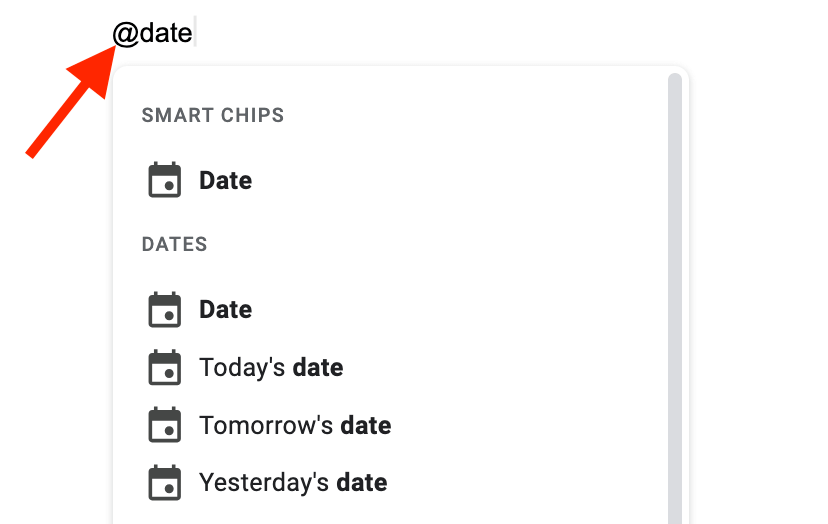
To use this method to insert dates into your Google document, first type in the “@” symbol at the point you want to insert the date then enter any of “today“, “yesterday“, “tomorrow” or “date” after the symbol and hit Enter or Return on your keyboard to insert a date.
Here are what these options mean
- @today – This will simply insert the current date i.e. today’s date.
- @yesterday – This will insert the date of the previous day i.e. yesterday’s date.
- @tomorrow – This will insert the date of the next day i.e. tomorrow’s date.
- @date – This will open up a date picker where you can select any date of your choice.
Alternatively, you can simply type in “@date” and select any of the options in the pop-up menu just like we have below.
After selecting any date of your choice and hitting the Enter or Return key on your keyboard, you should see that the date has been inserted at the point where you initially typed in the “@” symbol.
In some cases, the date you inserted may appear to be bigger than the rest of the text on your document and this is because the date element on Google Docs has a default text size of 19px.
To fix this issue, simply highlight the date using your mouse cursor then go to the Google Docs toolbar and reduce the text size from 19px to something smaller that matches the text size on the body of your document – usually 11px.
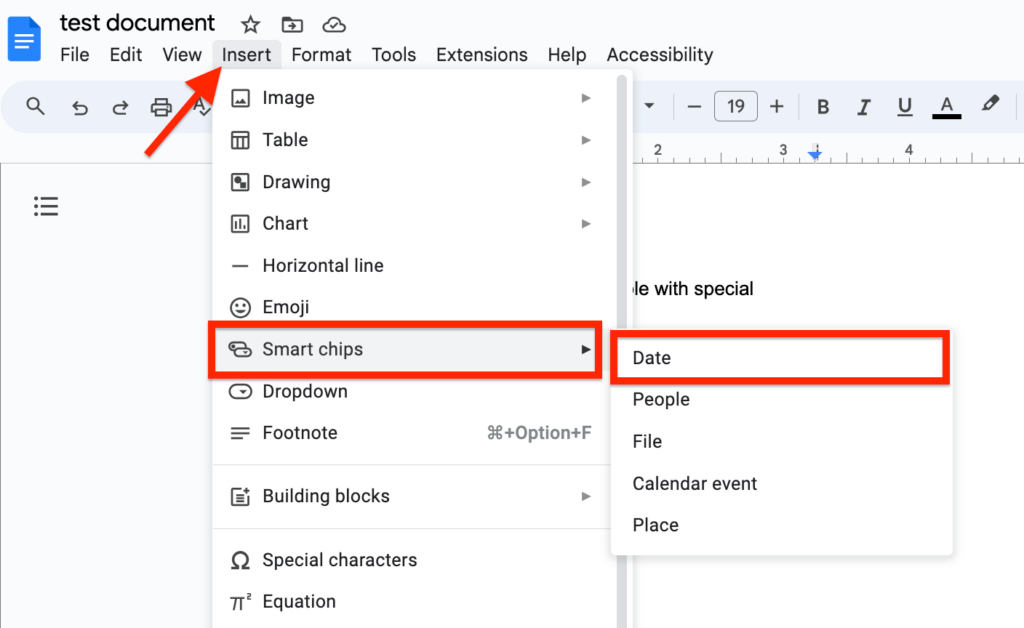
The second method you can use to insert a date in Google Docs is by using the Date Picker tool which can be found in the “Insert” menu on the Google Docs menu bar.
To use this method to insert a date into your document in Google Docs, first place the text cursor at the point where you want the date to be entered, then go to the Google Docs menu bar and select “Insert” > “Smart chips” > “Date“.
Now you should see a pop-up date picker at the point where you placed your text cursor earlier.
Select the date you want to insert from the calendar/date picker then click “OK” to close the dialog and insert the selected date.
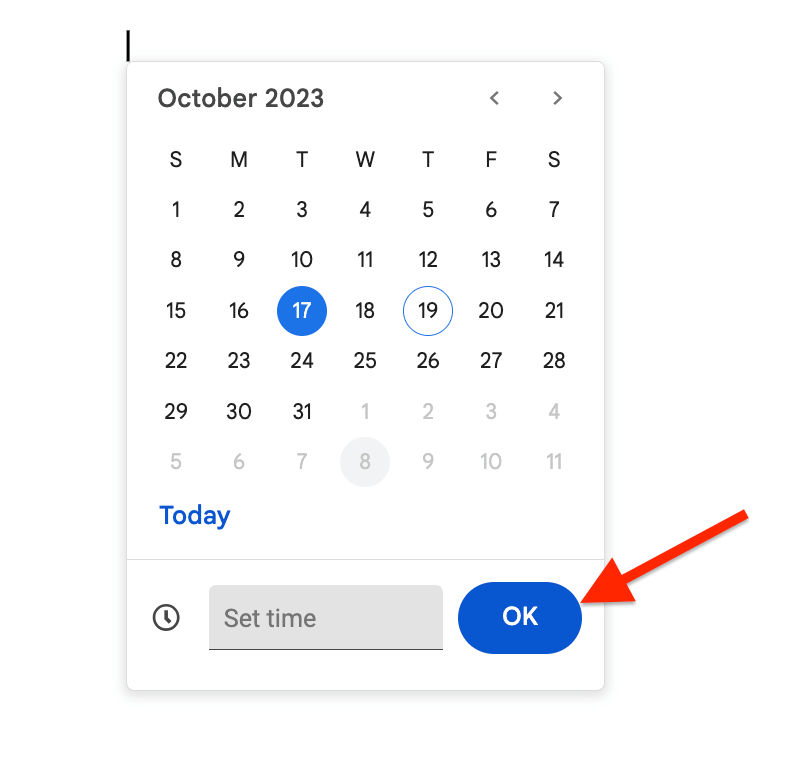
Additionally, if you need to insert a specific timestamp alongside the date, enter/select the time in the “set time” field before hitting “OK“.
And that’s how you can insert a date in Google Docs from the menu bar by using the Date picker feature in the Insert menu.
How To Change The Date Format On Google Docs
After inserting any date of your choice into your document in Google Docs, you can also customize/change the date format if you don’t like the default option.
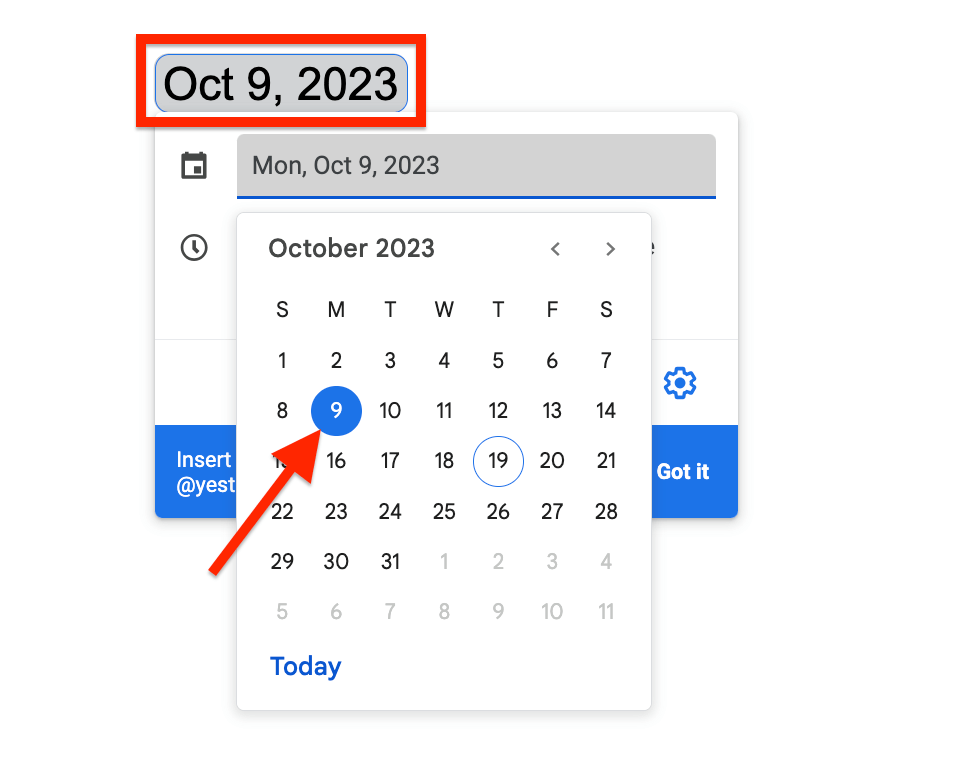
To do this, simply click on the date where it was inserted on your document.
Next, click on the Settings icon to the right-hand side of the popup dialog then select any of the available date formats from the drop-down menu as shown below.
How To Edit Inserted Dates In Google Docs
If you want to change the date you inserted into your document on Google Docs, there are two methods to go about it. You can either choose to delete the date completely and insert another one with a new (and correct) date or you can simply edit the date you already inserted.
To edit a date you already inserted in Google Docs, click on the date where it was inserted on your document then click on the date section on the popup dialog.
Now, after clicking or selecting the date on the popup dialog you should see the date picker dialog popup. Select the date you want to change to in this date picker and the change should reflect on the date you already inserted.
And that’s how you can easily edit a date you already inserted into your document in Google Docs.
Wrapping Up
Working with dates on Google Docs can be quite challenging especially if you’re new to the document editing platform in general.
Unlike other popular word processing platforms like Microsoft Word for example, where you can easily insert dates in your documents using the “Date & Time” tool on the toolbar, things are quite different on Google Docs.
To insert a date to your document on Google Docs, you can use the “@” symbol followed by any of the following terms – “date“, “yesterday“, “tomorrow” and “today” and hit Enter/Return on your keyboard.
Each term has a date it inserts into your document and we have discussed these extensively in the article.
Another method you can use to insert a date on Google Docs is by using the Date Picker tool under “Smart chips” in the Google Docs “Insert” menu.
