By default, Google Docs uses a single-column layout for documents created on the platform and you can increase the number of columns on a page to a maximum of 3 columns.
Google Docs also allows users to change the size of the spacing between the columns and add a line/divider between the columns.
But you may be asking, what if one wants to make uneven columns on Google Docs? Well, sadly that is not (yet) possible on Google Docs to make uneven or unequal columns on a page and if you want to make uneven columns on your document in Docs, you will have to use a few workarounds via tables.
The usual uniform columns (with a max of 3 columns) on Google Docs can be quite boring and not visually appealing for many document designs and if you’re tired of this and want to explore the world of uneven columns on Google Docs, you’re on the right page.
In this article, we will walk you through the process of making uneven columns in Google Docs easily.
Quick Answer:
To make columns of different widths on your document in Google Docs, follow these steps.
- Select Insert > Table on the Docs menu bar.
- Select the number of columns in the sub-menu.
- Adjust the width of individual columns to make them uneven.
- Enter your content into the columns.
- Right-click inside the table and select “Table Properties”.
- Expand the Color section.
- Set the table border width to 0 pt.
How To Make Uneven Columns In Google Docs (Step-By-Step Guide)
Currently, Google Docs doesn’t support changing the width of columns on documents on the platform even though it allows users to create up to 3 columns on a page.
As with other issues you might encounter while using Google Docs and other apps in the Google Workspace lineup, there is always a workaround, and the workaround for making uneven columns on Google is by using a table, adjusting the width of its columns and removing the border width of the table.
You can do this by simply inserting a table with your desired number of columns from the Docs menu bar. After that enter your content in the columns and adjust the width of individual columns depending on your preferences to make them uneven.
After adjusting the width of individual columns on the table, simply right-click on the table and select “Table properties” then expand the Color section on the Table properties side panel and set the table border width to 0 pt.
Below is a step-by-step guide showing how you can make uneven columns on your Google document in a few easy steps.
Step 1: Create a table with your desired number of columns.
First, you would have to create a table with your desired number of columns on Google Docs.
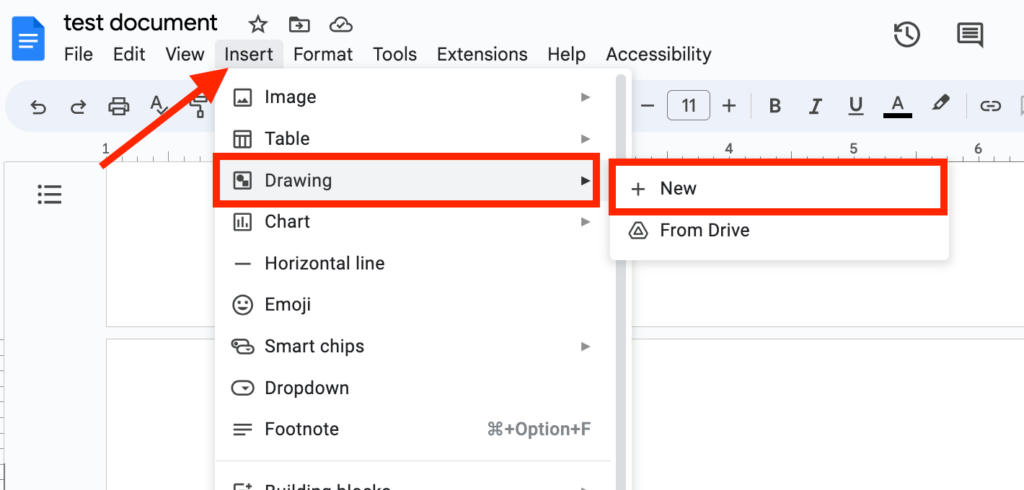
To do this, go to the menu bar, select Insert > Table, and select the number of columns for the table depending on your preferences.
For this tutorial, we intend to make a page with 3 uneven columns so we will be inserting a table with 3 columns and 1 row (3×1 table) as shown in the screenshot below.

Step 2: Adjust the width of individual columns to make them uneven.
Next, you need to adjust the individual columns on the table to make the columns uneven depending on the design you intend to achieve.
To do this, just hover your mouse arrow over the line that divides each column, hold your left button, and move to the left (to increase the width) or right (to decrease the width).
After adjusting the width, your table should look like what we have below. It doesn’t have to be the same, but similar at least.

Step 3: Enter your content into the columns on the table.
Now, enter your content in the appropriate columns.
Don’t worry about (or adjust) the height of the columns while typing/pasting your content since the height of the column will adjust automatically depending on the length of content entered.

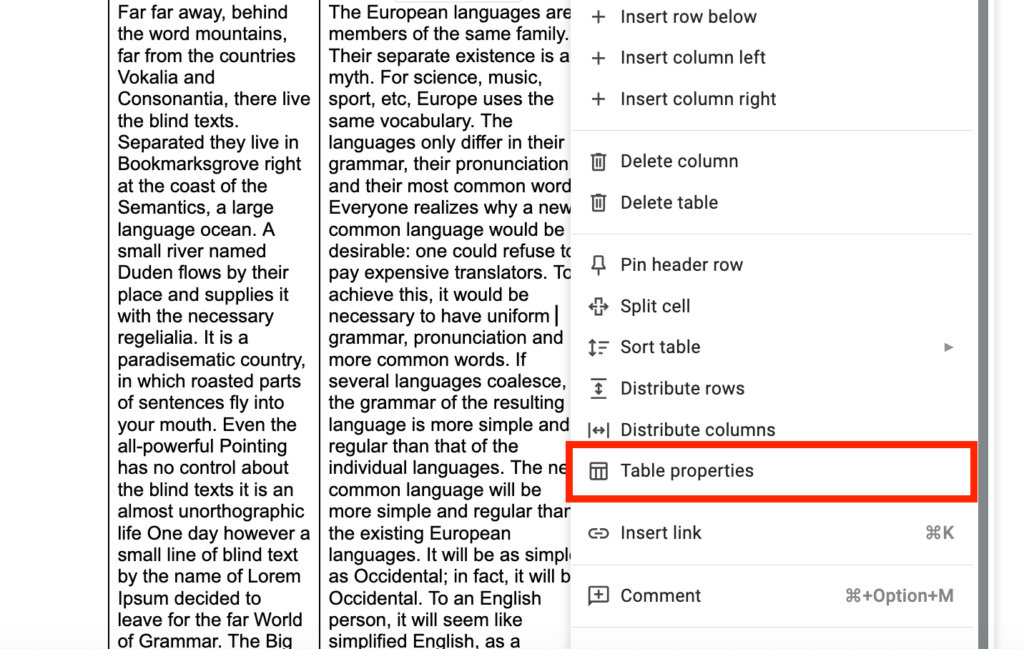
Step 4: Right-click anywhere inside the table and select “Table properties”.
Next, right-click anywhere inside the table and select “Table properties” from the available options on the sub-menu to open the Table properties side panel.

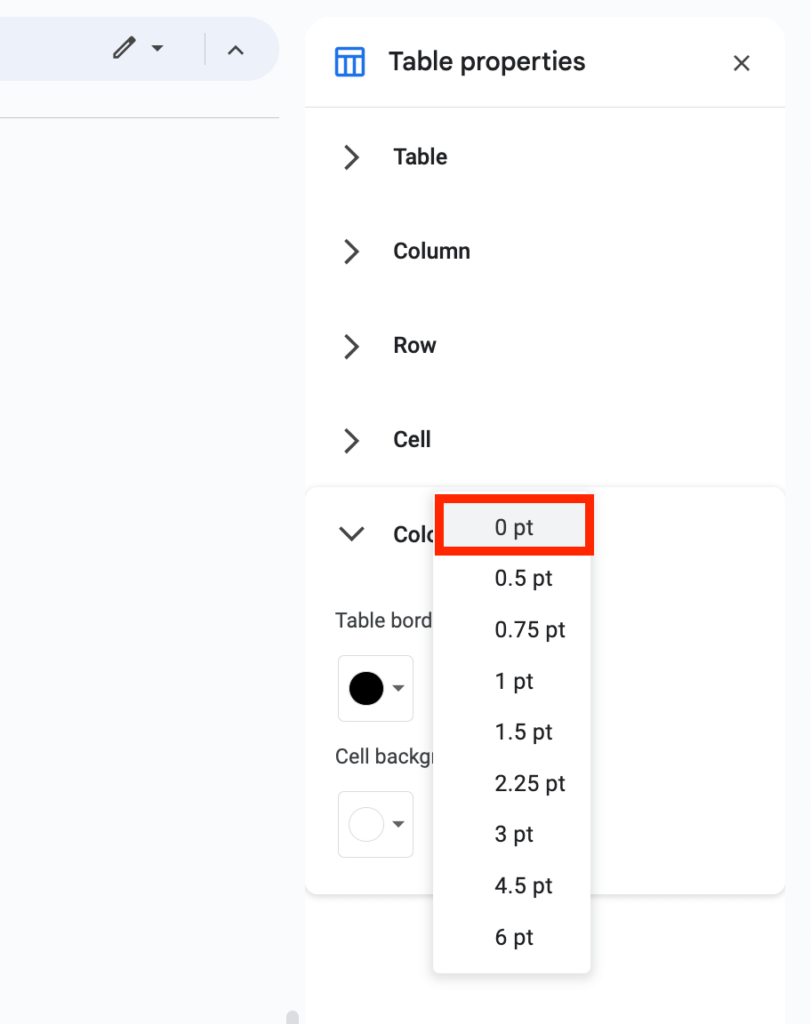
Step 5: Set the table border width to 0 pt in the “Color” section.
Finally, expand the “Color” section on the Table properties side panel and set the table border width to 0 pt.

After that, you should see the borders of the table disappear and you now have a page with uneven borders.

And that’s how you can create a page with columns of different widths on Google Docs. It’s quite easy!
Wrapping Up
In conclusion, understanding the workaround to creating uneven columns on Google Docs opens up a new world of opportunities for creating visually appealing designs on your documents.
Uneven columns offer many benefits to documents including accommodating different content types, enhancing the readability of texts, emphasizing content, and more.
On Google Docs, you can only create up to 3 columns on a page and the width of these columns cannot be adjusted or tweaked. If you want to add columns with uneven widths on a page on your document, you will have to use a table with no border width.
And that will be it for this guide. If you were searching for a way to create multiple columns with different widths on a page in your document on Google Docs, we hope you found this article helpful.