

Line numbering is a very useful tool in word processing and document editing. Numbering the lines on your document can help with referring to specific sections of your documents thereby making it easier for your readers to locate relevant information on the document.
If you primarily use Google Docs – which is Google’s free document editor – to create and edit your documents, you might have noticed that the line numbering feature is missing on the platform.
This can be particularly frustrating when working on academic papers, legal documents, or other documents that may require line numbering on the platform.
Thankfully, there are serval workarounds you can use to number the lines on your documents in Google Docs, and in this article, we will explore various methods to add line numbers in Google Docs.
Quick Answer:
To add line numbers in Google Docs, follow these steps.
- Create a new document in Google Docs.
- Insert a numbered list.
- Enter your text in the numbered list.
- Hit Enter or return to create a new line.
How To Add Line Numbers In Google Docs (Multiple Methods)
There is currently no built-in line numbering feature on Google Docs and this can be quite challenging for many Google Docs users, especially users who are coming from a more complete word processing software like Microsoft Word where adding line numbers is a breeze.
Thankfully, as with many other limitations of the Google Docs platform, there are a few workarounds for getting line numbers on your documents.
The first method is by using the “Numbered list” feature on Google Docs. A Numbered list can help you achieve almost the same result as you would expect from a native line numbering feature although there are a few limitations.
The second method is by inserting a simple table with 2 columns and any number of rows (depending on the number of lines you’re numbering), adjusting the look of the table, entering the text, and removing all table borders so the table becomes invisible.
Below we discuss all methods which can be used to add line numbers to your Google Documents in detail.
Method 1: Using a numbered list.
A numbered list is one way to get line numbers on your documents in Google Docs especially when you’re creating a new document. Bear in mind that this method may not work for adding line numbers on an existing document.
Here is how to add line numbers in Google Docs by using a numbered list.
Step 1: Create a new Google document.
First, go to your Google Docs dashboard then click the circular floating action button with a “+” icon at the bottom right corner of the page to create a new (blank) document in Google Docs.

Step 2: Select “Numbered list” on the toolbar.
Next, you will need to insert a numbered list into the blank document you just created.
To do this, simply go to the Google Doc toolbar then click the numbered list icon to insert a new numbers list into the document.
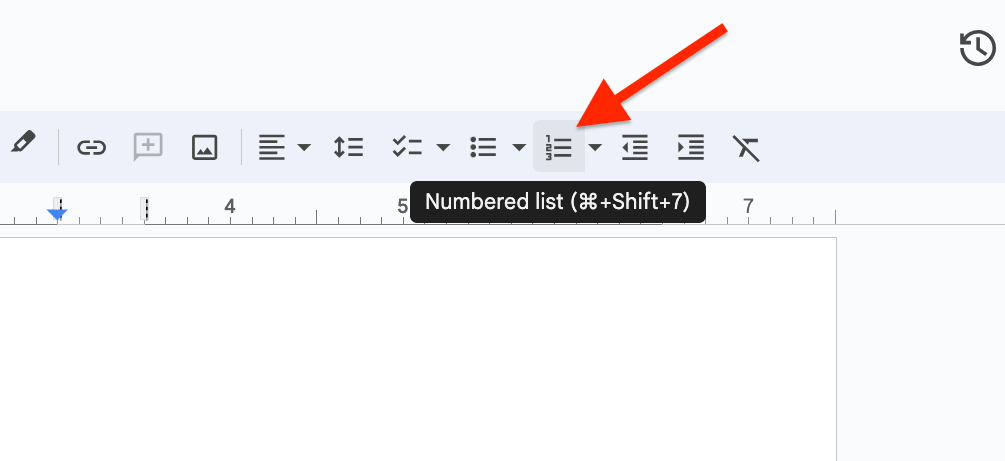
Alternatively, you can also use a keyboard shortcut to add a numbered list. To do this, simply hit (and hold) Ctrl + Shift + 7 (or command + shift + 7 if you’re on macOS).
After using the key combination, a numbered list should be inserted into your document.
Step 3: Enter your text.
Finally, type in the text you want to add to the document.
If the text is too long for the line, Google Docs will automatically take you to the next line but won’t create a new line number.
To fix this, you will need to add a new line manually by hitting the Enter or return key on your keyboard and a new line (with the subsequent line number) will be created.
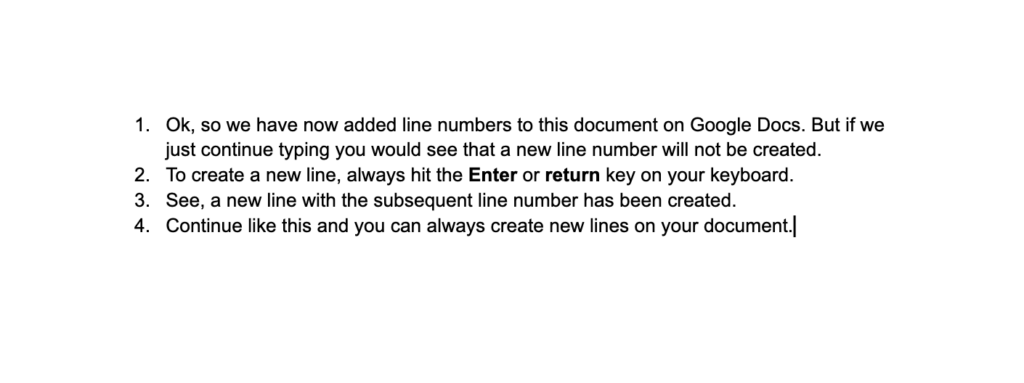
And that’s how you can add line numbers to your document in Google Docs by using the numbered list feature on the platform.
Method 2: Using a table.
Another workaround for adding line numbers to each line on your document in Google Docs is by using a simple table with all the borders removed. Tables have always been great to manipulate layouts in Google Docs.
Here is how to add line numbers in Google Docs by using a table.
Step 1: Insert a table into your document.
First, you will need to insert a table with 2 columns – one for the line number and another for the line number, and another for the text – and any number of rows depending on the number of lines you want to add.
Inserting a table in Google Docs is quite easy. Simply go to the Google Docs menu bar click “Insert” > “Table” then select the number of rows and columns you want to add to the new table.
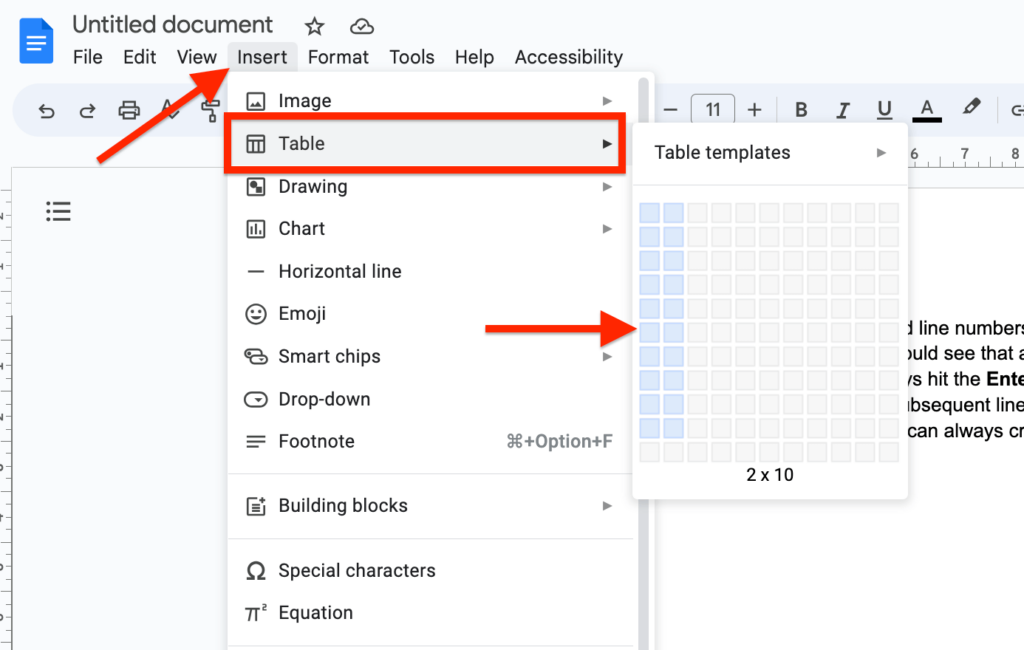
Ensure you select only 2 columns and move your cursor down on the sub-menu to create as many rows as needed depending on the number of lines needed for the texts you want to add line numbers to.
Step 2: Make the first column of the table smaller.
Since we will be using the first column for line numbers and the second column for the texts we want to add line numbers to, we will need to make the first column smaller so there will be enough room for in the second column for the texts (which will be numbered) to be added.
To do this, simply hover your cursor over the border separating the two columns, then click and drag to the left to reduce the size of the first column.
After reducing the size of the first column, you should have something like what we have in the screenshot below.

Step 3: Add a numbered list to the first column.
Next, you will need to add a numbered list to the first (line number) column.
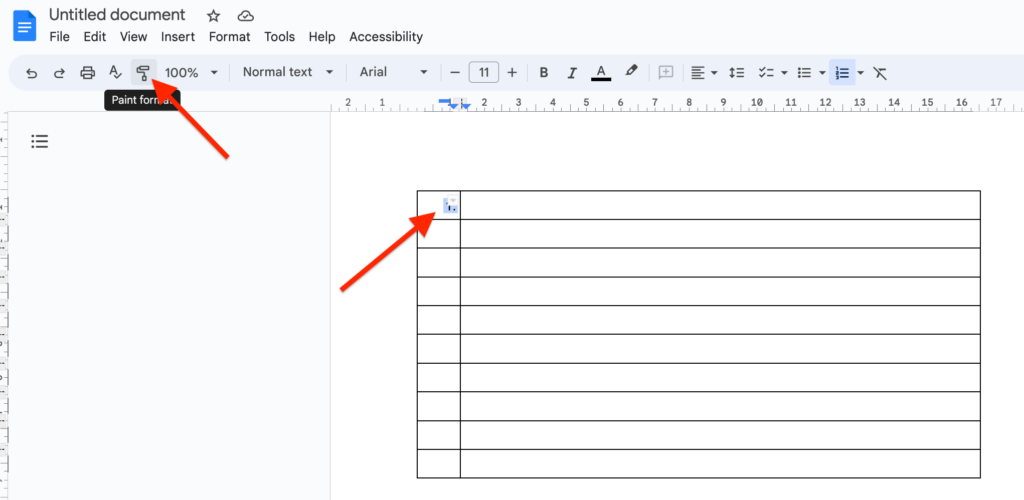
To do this, place your cursor on the first row in the first column then go to the toolbar and click on the “Numbered list” icon to add a numbered list to the column.
After adding the numbered list, you will notice that only the first row in the first column has a line number but we need all rows in the first column to have their respective line numbers.
Fixing this is easy. Simply highlight the number on the first row “1.” then go to the toolbar and double-click on the “Paint format” icon.
Now, go back to the table then click on the next row to add the subsequent number. Repeat this step until you add all the line numbers needed on the table.
After adding all the required line numbers, go back to the toolbar and click on the “Paint format” again to deactivate it.
Step 4: Enter your texts in the second column.
Add all the texts you need in the second column just like we have in the screenshot below.

For texts that are longer than the given space, you can either adjust the margins of the entire table using the ruler feature on the top of the page (just below the toolbar) or cut the text short and add the remaining in the next line.
On tables, the Enter or return key doesn’t work for creating new lines so you will have manually select to the next row to add text on another line.
Step 5: Remove all table borders.
When you’re done with adding all the text, you will need to remove all the borders of the table.
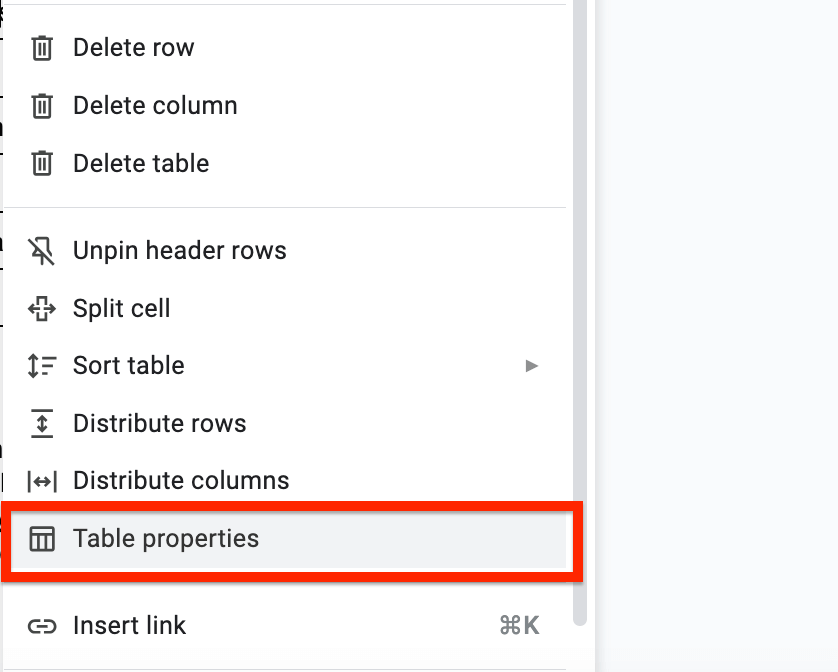
To get rid of all the borders of the table, right-click anywhere inside the table then select “Table properties” from the available options.
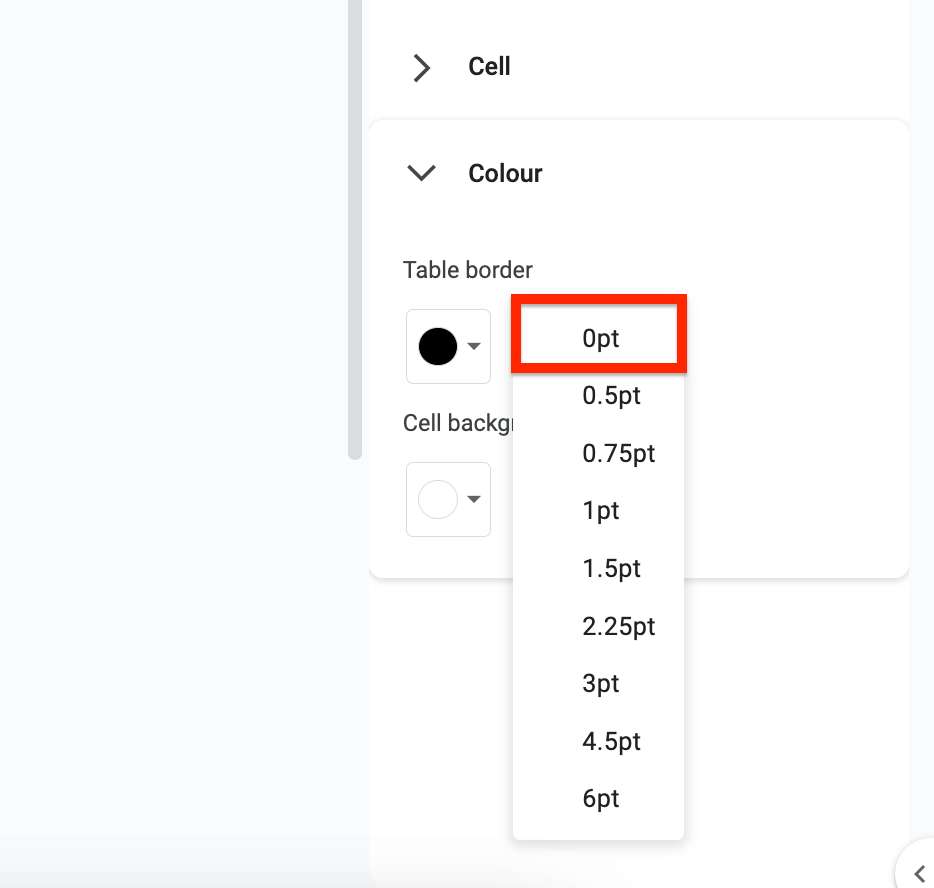
Now you see a side panel on the right-hand side of the Google Docs window. Scroll down on the panel, expand the “Color” section then set the Table border width to 0pt.
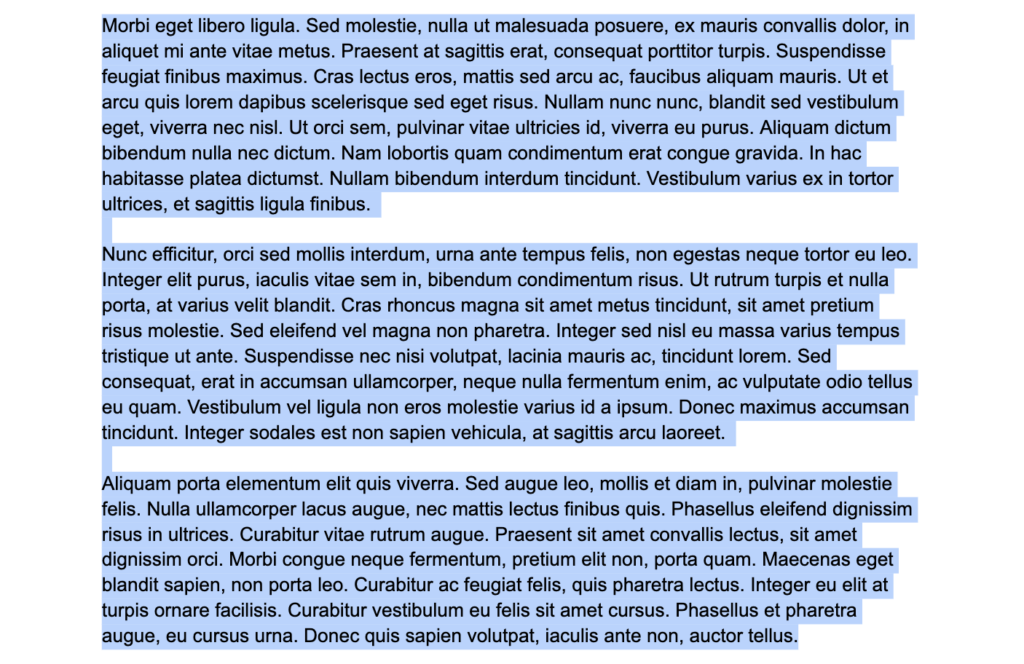
After that, all the borders of the table should be gone and all line numbers and text you added will remain visible.

And that’s how you can add line numbers in Google Docs by using a table.
How To Add Paragraph Numbers in Google Docs
Just like there is a workaround for adding line numbers in Google Docs, you can also number paragraphs on your Google document by using the Numbered list feature.
Here is how to add paragraph numbers in Google Docs.
Step 1: Highlight all paragraphs you want to number.
First, open your existing document and highlight all the paragraphs you want to add paragraph numbers to.
You can highlight all the paragraphs on a document in Google Docs by either clicking and dragging your mouse cursor across the document or using a key combination of Ctrl + A or command + A (for users on macOS) on your keyboard.
Step 2: Put all the selected paragraphs in a numbered list.
Next, go to the Google Docs toolbar and click the “Numbered list” icon to put all the paragraphs you selected in a numbered list.

And that’s it, you have successfully numbered all the selected paragraphs on your document and you should see that all the paragraphs now have their respective paragraph numbers.
Can I Add Line Numbers On Google Docs Using A Chrome Extension?
One common fix for many issues we have seen on Google Docs is by simply installing a browser extension or addon that was created for that specific issue.
In the past, there used to be a Google Chrome extension that allowed users to add line numbers in Google Docs but the project has so far been discontinued.
So the answer to this question, as of the time of compiling this article is No, there is currently no way to add line numbers on Google Docs by using a Google Chrome extension.
Maybe in the future, there could be other Chrome extensions that can be used to add the line numbering feature to Google Docs, but right now, line numbers can only be added to documents on Google Docs using either the Numbered list feature or via tables.
Wrapping Up
On most word processing platforms like Microsoft Word, line numbering comes as a built-in feature and can be easily added to documents but this is not the case for Google’s free document editing offering – Google Docs.
Like with other limitations of Google Docs, there are a couple of workarounds you can use to add line numbers to your documents on the platform. The first method is by utilizing the Numbered list feature.
Another method you can try is by using a borderless 2-column table, and we have explained both methods in detail throughout the article.
Adding line numbers using any of these methods will help in enhancing the professional look and functionality of your documents.
