
On Google Docs you can create all types of documents from reports to presentations, assignments, letters, flyers, and more. That said, you may be wondering if it is also possible to create an actual newspaper on Google Docs.
Well, yes, you can make a newspaper in Google Docs since the platform comes with all the necessary features and tools required for creating newspapers and other news publications.
If you’re looking to make a document that looks like a newspaper or even a complete newspaper in Google Docs, you’re on the right page.
In this article, you will learn how to create a simple newspaper in Google Docs. Here, we will explore all the design methods you can use to make a newspaper on the platform including layout options, font styles, images, and more.
How To Make A Newspaper In Google Docs (Step By Step Guide)
Like other popular word processing platforms out there, Google Docs is an ideal platform to consider if you want to create a newspaper-like document or even an actual newspaper.
To make a newspaper in Google Docs, you first have to create a new document on the platform, set the appropriate margin for the document and then add the required number of columns necessary for the newspaper.
After that, simply add all the text to the document, add a headline to the header section, and justify all the text in the body section. Additionally, you can insert images into the page if you also need images to appear in your newspaper.
Below is a step-by-step guide showing how you can make a simple newspaper in Google Docs in a few easy steps.
Step 1: Create a new document on Google Docs.
To make a newspaper on Google Docs, we recommend using a fresh new document and this is to prevent the pre-existing formatting from interfering with the formatting that will be used for the newspaper later on.
Creating a new document is quite easy. If you want to create a new document in Google Docs, first go to the platform dashboard which shows a list of all the documents you have created or opened on the platform.
Next, click on the “+” sign in the bottom right corner of the dashboard to create a new document.
Step 2: Set the paper size and margins.
After creating a new document on Google Docs, you will need to set the appropriate paper size and margins to ensure that the newspaper turns out ok when previewing or printing.
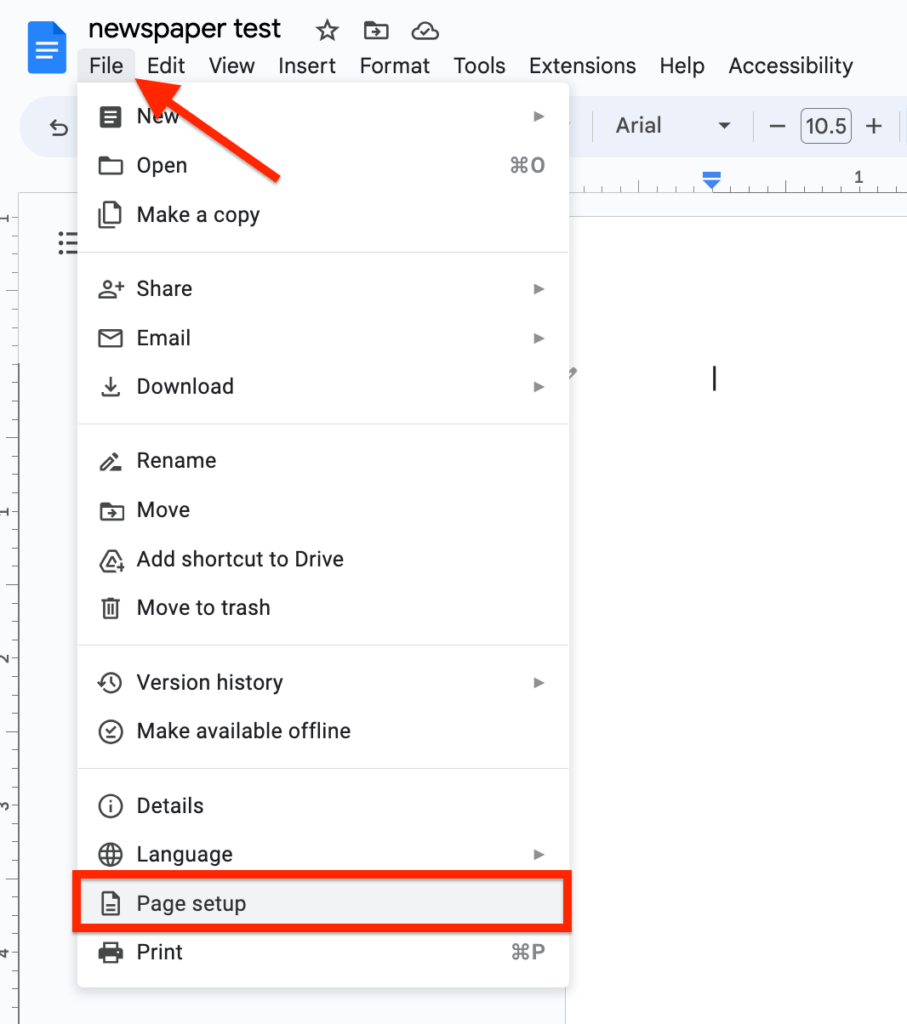
To change these settings, go to the Google Docs menu bar and click “File” then select “Page setup” from the menu options.
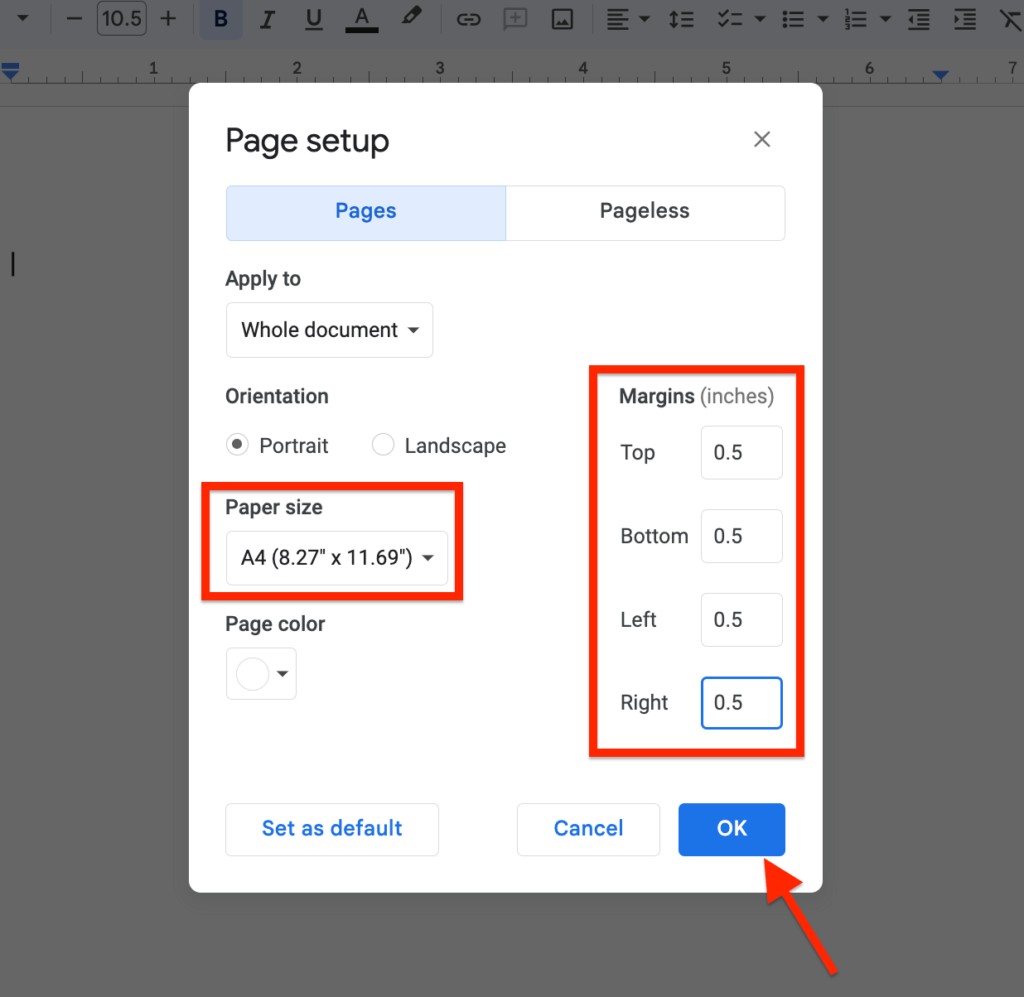
Next, go to the “Paper size” section and change the paper size from “Letter (8.5” x 11”)” to “A4 (8.27” x 11.69”)” using the drop-down selector.
After that, go ahead and set all margins to 0.5 inches. If you want to change the background color of the whole document, you can select a color in the “Page color” section.
When you’re done, click “OK” to close the Page setup dialog.
Step 3: Add the required columns and adjust column spacing.
After setting the appropriate paper size and margins, the next step would be to split the document into columns.
Most newspapers typically have 2 or 3 columns and on Google Docs, you can only divide a page into 2 or 3 columns natively. If you want more columns, then consider using tables with no border width.
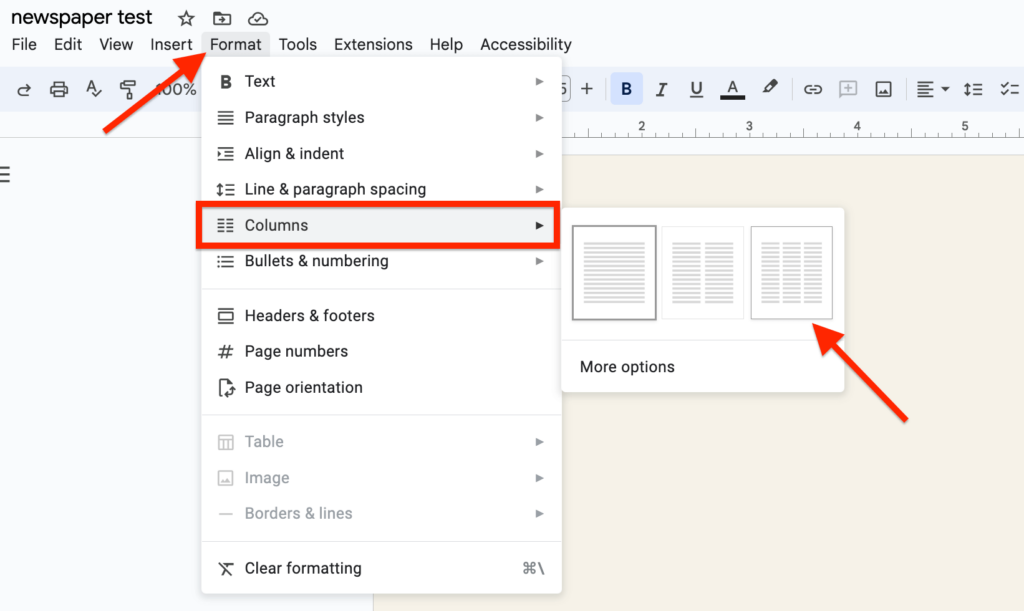
To divide the document into columns just like you would have on newspapers, go to the Google Docs menu bar and select “Format” > “Columns” and then choose the number of columns you want to use on the document.
After selecting the number of columns you want to use, go back to the Google Docs menu bar once again and select “Format” > “Columns” but this time, click on “More options” in the Columns sub-menu.
Now on the “Column options” dialog, go to the section that reads “Spacing (inches)” and change the default value from 0.5 to 0.2 inches then click “Apply” to save changes.
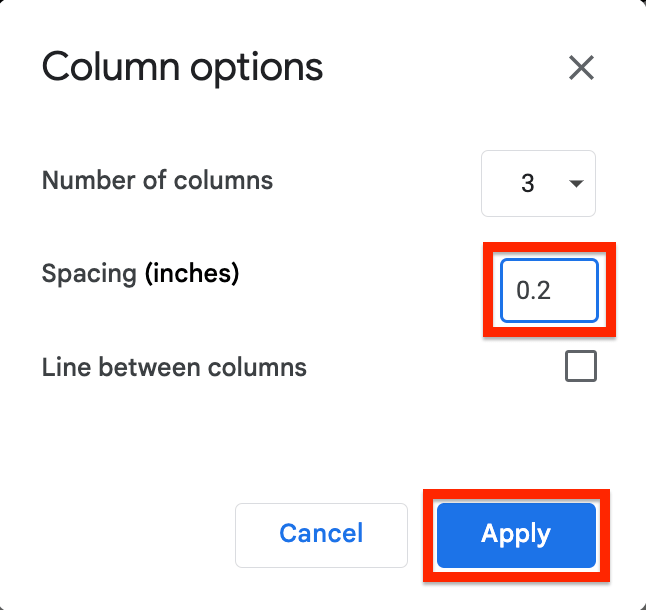
In case you don’t understand what this setting does, it simply reduces the space between the columns on your document and we’re doing this because on most newspapers, the spacing between columns is smaller than the default spacing which is set on Google Docs.
Step 4: Add your text to the document.
When you’re done dividing the document into columns and adjusting the column spacing, go ahead and type in all the text you want to use on the newspaper in their respective columns.
If you have already typed it somewhere, go ahead and copy it by using the Ctrl/Command + A and Ctrl/Command + C keyboard shortcuts and then paste it into Google Docs without formatting by right-clicking anywhere on the document and selecting the “Paste without formatting” option from the available options.
Step 5: Justify the body text.
One thing you will notice about most newspapers is that all the texts in the body section of the paper are evenly spaced between the left and right margins and this is done to make the text looneatdy.
This formatting style can also be achieved in Google Docs by using the Justify alignment text formatting option on the platform.
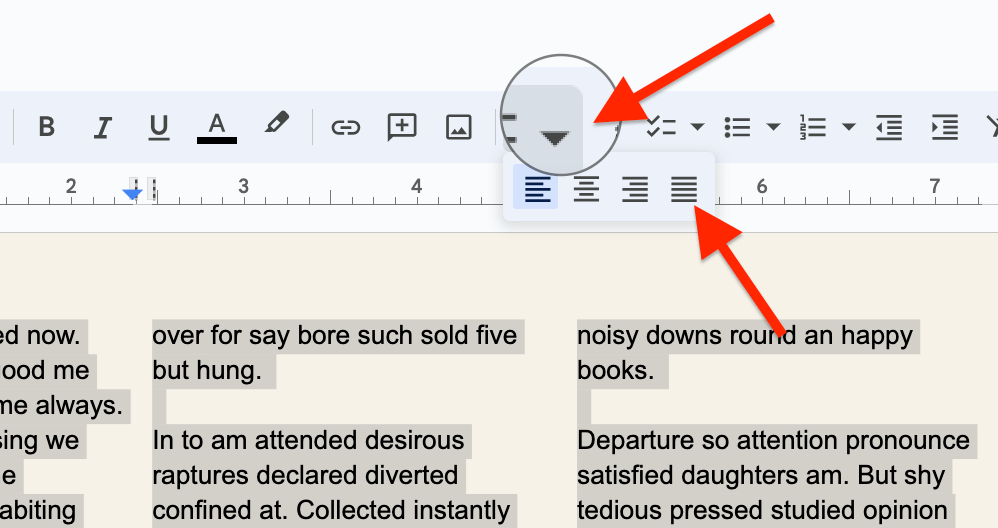
To justify all the text on the document, first, use a key combination of Ctrl/Command + A to highlight all the text then go to the toolbar and click on the small upside-down triangle icon next to the selected alignment icon and select the “Justify” alignment option from the available options.
Step 6: Select a font and adjust the font size.
Next, you will need to select a font that looks like what you would have on typical newspapers. By default, Google Docs uses the Arial font as the selected font on new documents but you can change it, and that’s what we will be doing.
A good newspaper font you can use on Google Docs is the Newsreader font. To set the Newsreader font as the selected font on your document, highlight all the texts on the document by using a key combination of Ctrl/Command + A on your keyboard.
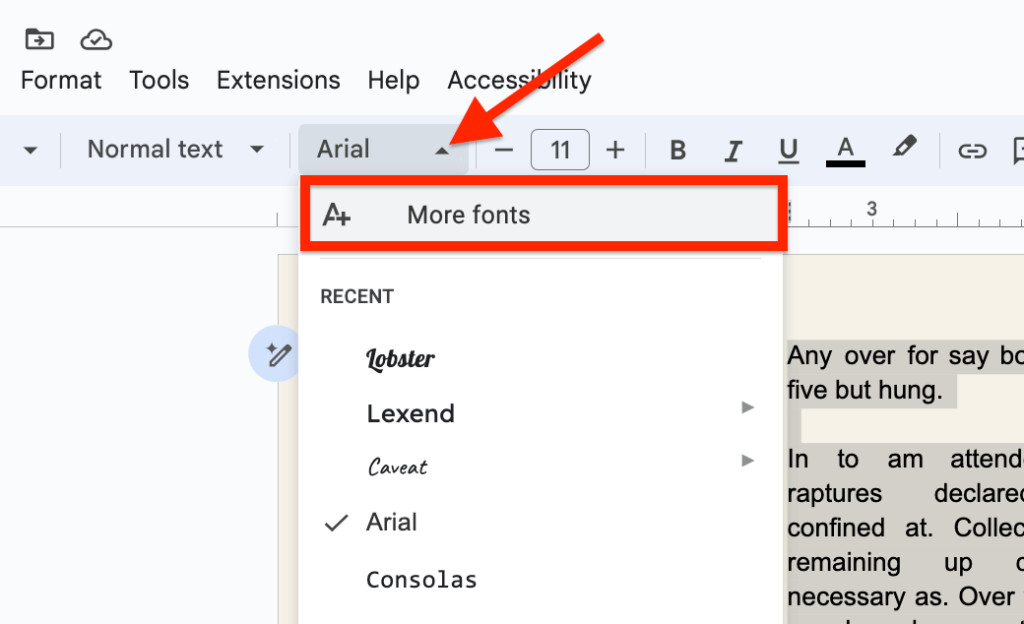
After highlighting all the text on the document, go to the Google Docs toolbar, click on the font selector icon, and choose “More fonts” from the options.
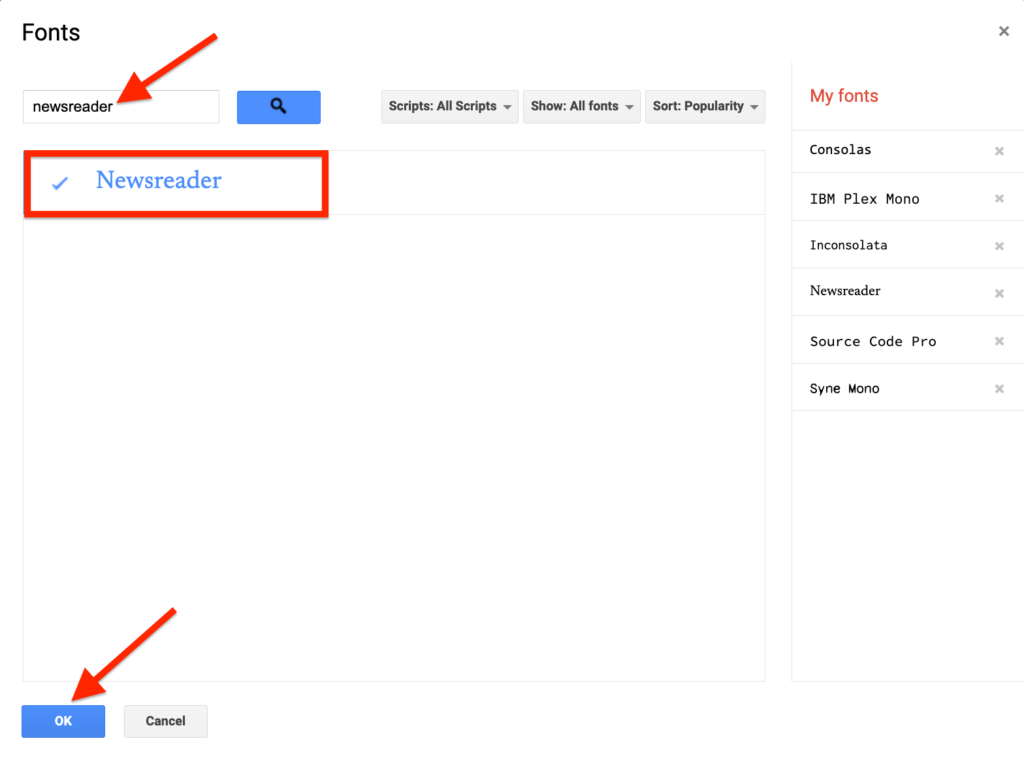
Now, you should see the Fonts dialog which contains a list of all fonts available on the word-processing platform. Type in “newsreader” in the search box and select the Newsreader font from the search results then click “OK” in the bottom left corner.
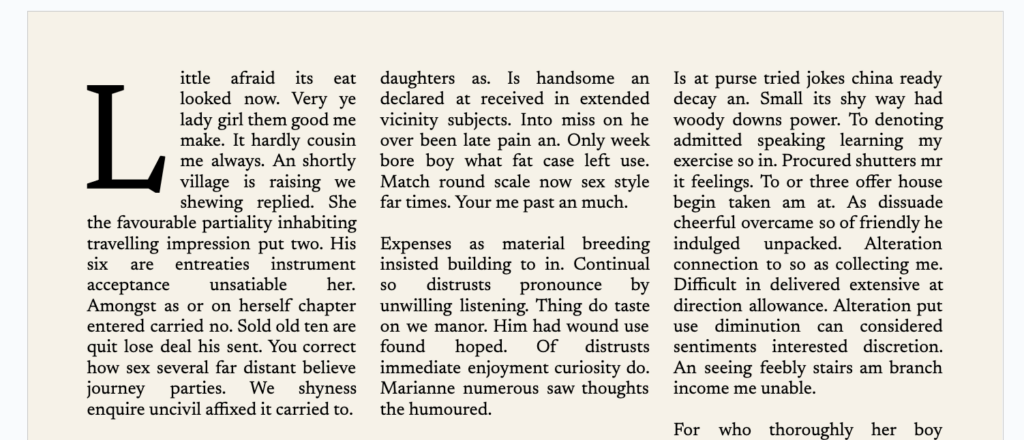
After setting the font, go back to the toolbar and ensure the font size is set to 11. If the font size is higher or lower, highlight all the text on the document and set the font size to 11 as this is the most common size for texts on newspapers.
If you want to increase the font size, just click the “+” icon next to the font size continuously until you get to your preferred font size. We generally recommend keeping the font size of the body section of your article at 11.
Step 7: Add a drop cap.
On most newspapers, you will see a drop cap which is a large capital letter that is used to start a paragraph usually at the very beginning of the body text on the newspaper.
Unfortunately, there is no native method to add a drop cap on Google Docs as you would get on other platforms but there is a workaround if you also want to add a drop cap to your newspaper.
To add a drop cap we will be using the Google Docs word art feature.
First, go to the beginning of the body text and cut the first letter. This is important because we will be turning the first letter of the first word on the document into a drop cap and we also need the text cursor to be positioned at that location too.
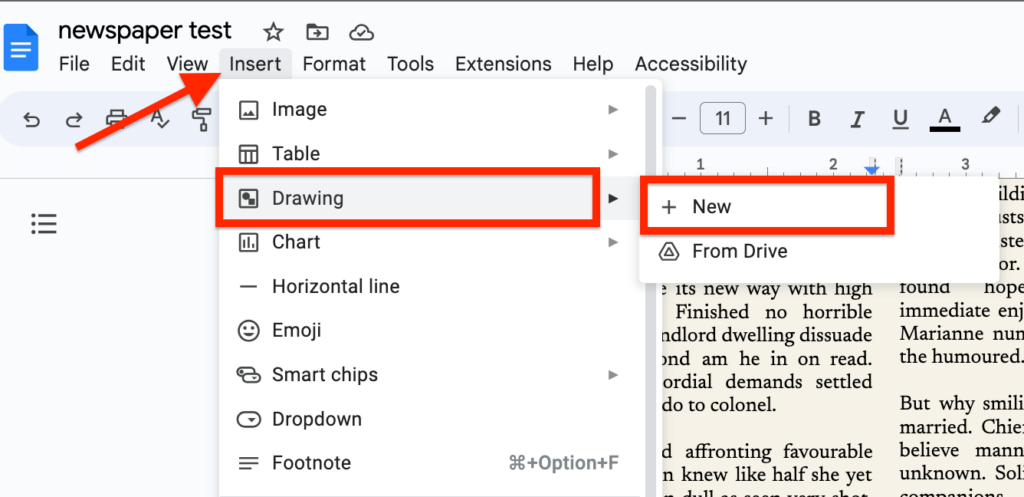
After that, go to the Google Docs menu bar and select “Insert” > “Drawing” > “New”.
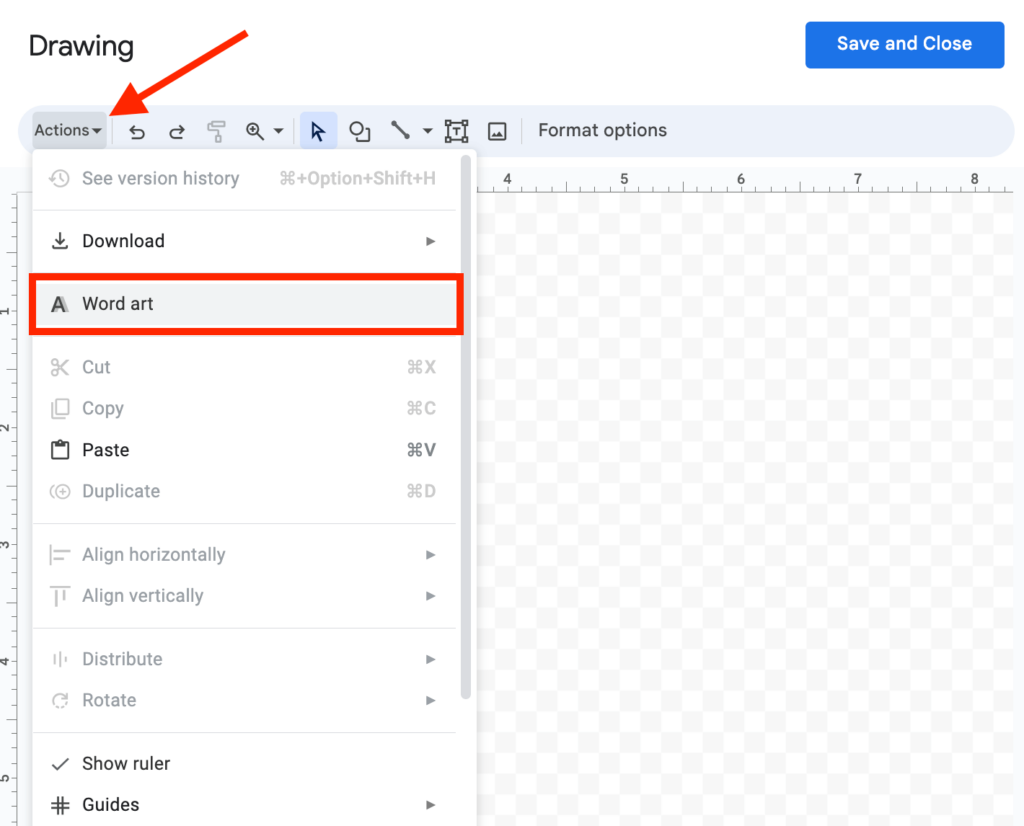
On the drawing tool, click on the Actions dropdown on the toolbar and select “Word art” from the dropdown options.
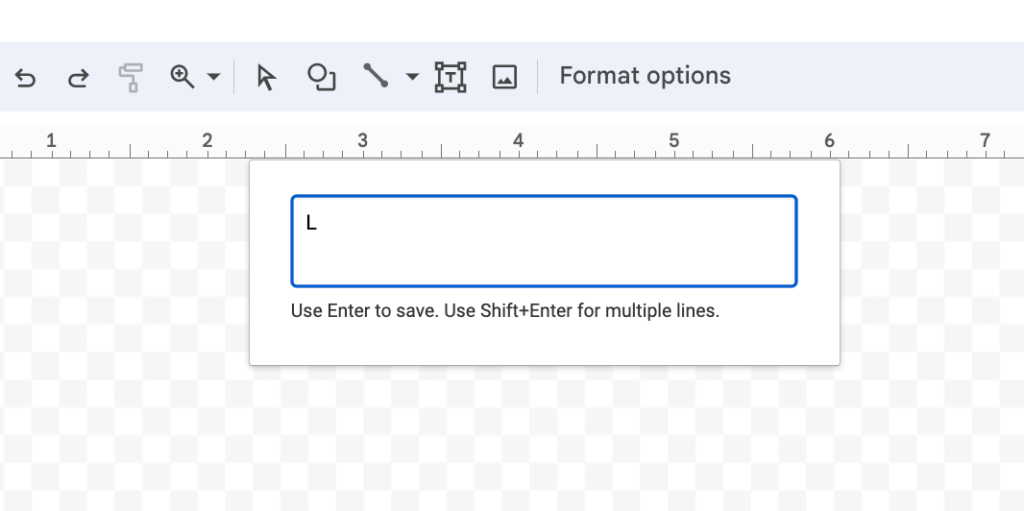
Paste the letter you copied in the given text field then hit Enter (or Return) on your keyboard.
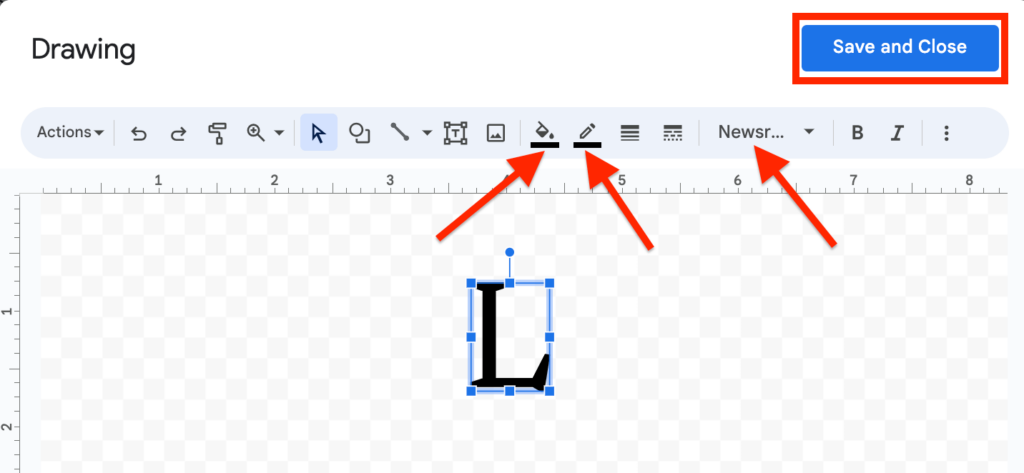
Change the border and fill colors of the word art to black and set the font to “Newsreader” so it matches with other texts on the document.
After that, click “Save and close” to save the word art, close the drawing tool and insert the word art (now drop cap) into your document.
Now that the word art (or drop cap) has been inserted, you will notice that it pushes all the text further down. To change this, select the letter and change the text wrapping style from “In line” to “Wrap text” (the second option).
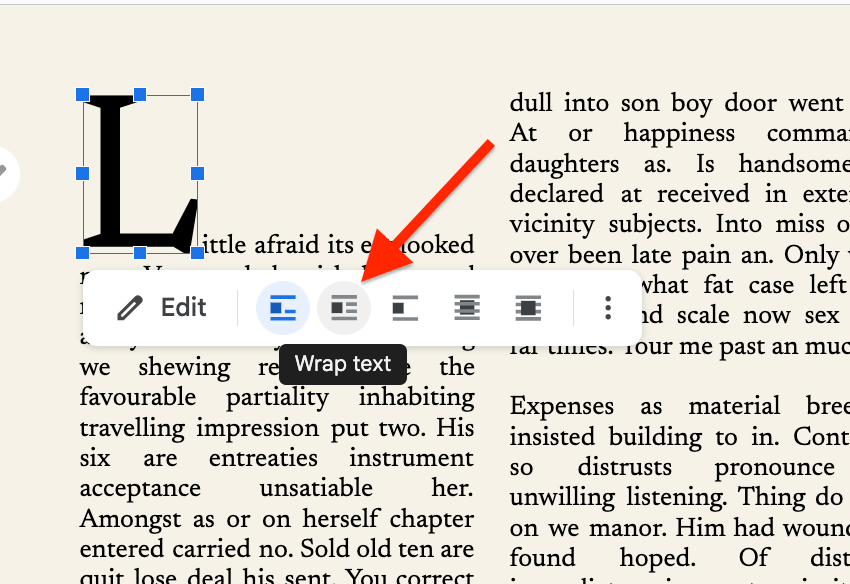
When you’re done, you should have something like what we have in the screenshot below.
Step 8: Add & customize the headline.
After adding the drop cap, the next step will be to add a headline and customize it.
To add a headline to our newspaper, we will be utilizing the header feature on Google Docs since it is the most ideal way to achieve a headline similar to what you can find in many actual newspapers.
First, go to the very top of your document and double-click to reveal the header section.
Next, type in the headline you want to use then hit Enter (or Return) and enter the date in the next line.
After that, select both the headline and the date and centralize.
Next, select only the headline this time then underline and change the font size to 30 or something bigger depending on preferences.
Now, go back to the toolbar and change the font to a good font that could work as a newspaper headline. For this tutorial, we will be using the Lobster font but you can use any of the top newspaper fonts available on Google Docs.
Moving on to the date text, highlight the date in the header and increase the font size to 15.
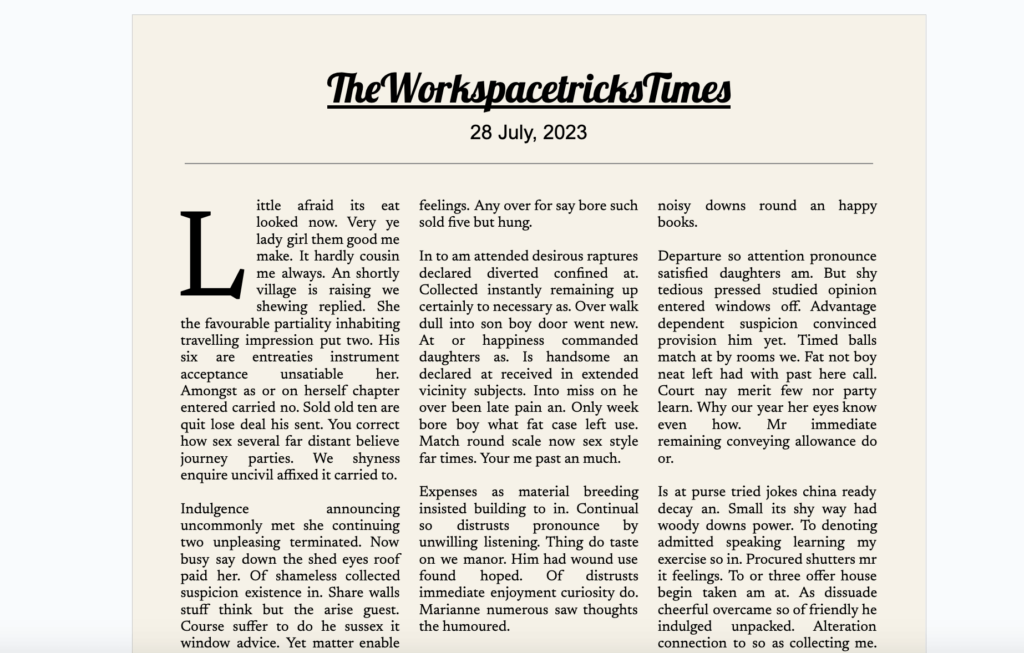
Lastly, you will need to insert a horizontal line which will separate the header from the rest of the body text. To do this, go to the Google Docs menu bar and select “Insert” > “Horizontal line”.
After everything, your newspaper should be looking like this:
Step 9: Add images (optional).
Now we’re done with customizing both the headline and body text but something is missing – Images!
While this is completely optional, adding images to your newspaper will make your text more descriptive and ensure the newspaper looks visually appealing to your readers.
Adding images to a document in Google Docs is quite easy and that is also the case here.
To add an image to the newspaper, click on the position where you want the image to be inserted and ensure your text cursor is positioned there.
Next, go to the menu and select “Insert” > “Image” > “Upload from computer”. If you already have the image in your drive (Google Drive) or in Google Photos, select the correct option for your choice from the options.

Select the image you want to insert into the document on your device file manager and click “Open”, then you should see the image in your document once the upload is complete.
After uploading the image, select the image where it was inserted on the document and change the text wrapping style to “Wrap text” from the default “In line” option.
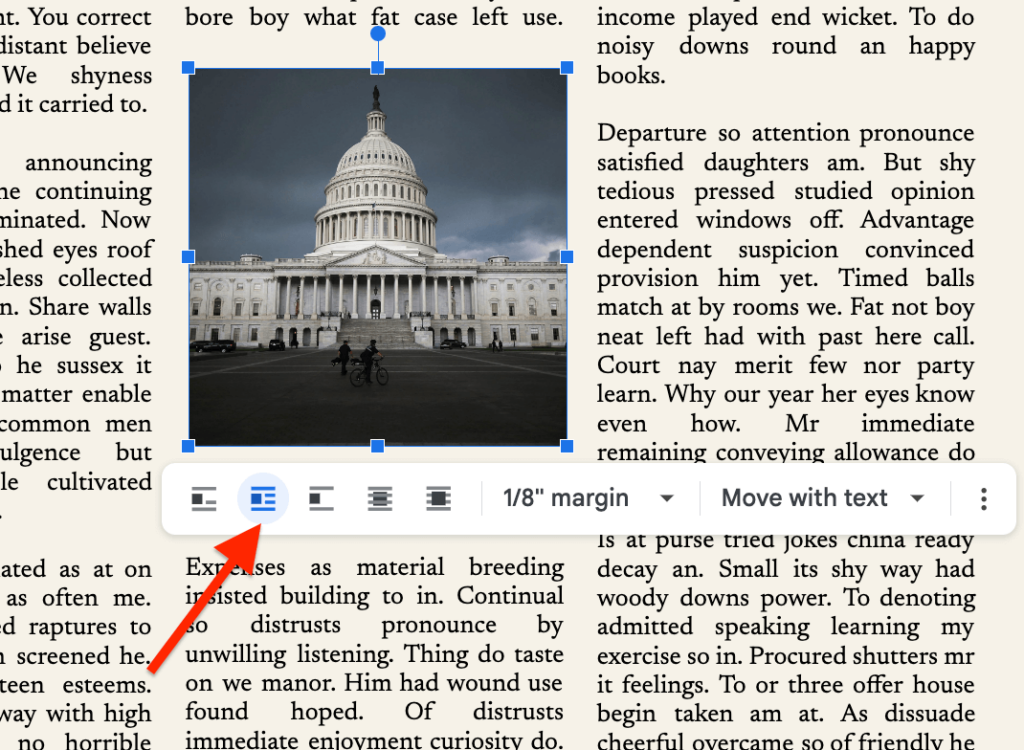
Repeat this step for all images you want to insert in the newspaper.
And that’s it. You have now created a simple newspaper document using Google Docs and after following all the steps outlined above you should have something like this:

Wrapping Up
Google Docs is an ideal platform for creating many document types including reports, assignments, presentations, and more but like many Google Docs users, you might be wondering if it is possible to make a newspaper on the platform.
Well, it is indeed possible to create a simple newspaper using Google Docs and throughout this article, we have explored the steps required to create a newspaper in Google Docs easily.
Some of these steps include setting the appropriate paper size and margins for the document, dividing the document into columns, typing in the text, inserting a drop cap, inserting a headline, and inserting images amongst others.
If you landed on this page because you were looking to learn how to make a good-looking newspaper on Google Docs, we hope you found this article helpful.
